

Drilling Acrylic Sheets - A Guide
Drilling acrylic is not hard, but carries high risks of material damage if done incorrectly
To drill an acrylic panel without cracking, splitting or damaging the sheet, there are a few considerations you should take note of.
Even though acrylic is approximately 1700% stronger than glass and is far more durable: you need to take care when drilling your acrylic sheets to prevent them from cracking and splitting. Fortunately, in this article we have put together a list of suggestions to help you drill acrylic in a way that helps you avoid ruining your panels.
The Properties of Acrylic
Acrylic is a remarkably strong thermoplastic which can withstand heat, impact, and shattering. Despite it being a plastic, clear acrylic sheet boasts very high clarity and is comparable to glass, only much cheaper in comparison. This makes acrylic a very efficient material for windows, display cases, and greenhouse glazing. Not only is acrylic UV-resistant - resisting discolouration from UV rays; it provides fantastic thermal insulation. Acrylic is extremely versatile, and can be molded, bent, shaped, and drilled.
Although acrylic is relatively easy to drill, it must absolutely be done correctly, in order to minimise the risk of damaging the material.
Potential risks
The main risk when drilling your acrylic is the potential for it to crack and snap. Despite its high durability and versatility, if drilled incorrectly, you could accidentally end up with a snapped, cracked and completely unusable acrylic panel.
Inappropriate tools can result in cracked acrylic, so ensuring you have appropriate equipment before starting your project is highly advisable.
What tools will I need?
Before you drill acrylic, you should have the correct equipment. Read below for our best tips on choosing and using the correct equipment to help avoid costly mistakes.
HSS Drill Bit
HSS (High-Speed Steel) drill bits are designed to be suitable for materials such as wood, aluminium and mild steel. They will typically last for at least 150 holes and to a maximum of 450 before they become too worn to function effectively. Brand-new drill bits may not be suitable for drilling acrylic sheets, as they could grip and tear your acrylic and inadvertently cause irreversible damage. It is recommended that you use a slightly worn HSS Drill Bit. Plastics engineers would usually "back off" a new drill bit by slightly grinding down the cutting edge before using it, to avoid material being gripped.
Clamps
Perhaps one of the most important pieces of equipment you could use whilst drilling acrylic is a clamp. Clamps will help to secure the sheet in place so it doesn’t move while you drill and result in cracked acrylic. The clamps can also prevent warping or spinning that may occur during drilling. By clamping your acrylic sheet in place, you’ll get a much cleaner finish to the job.
Marking Pen
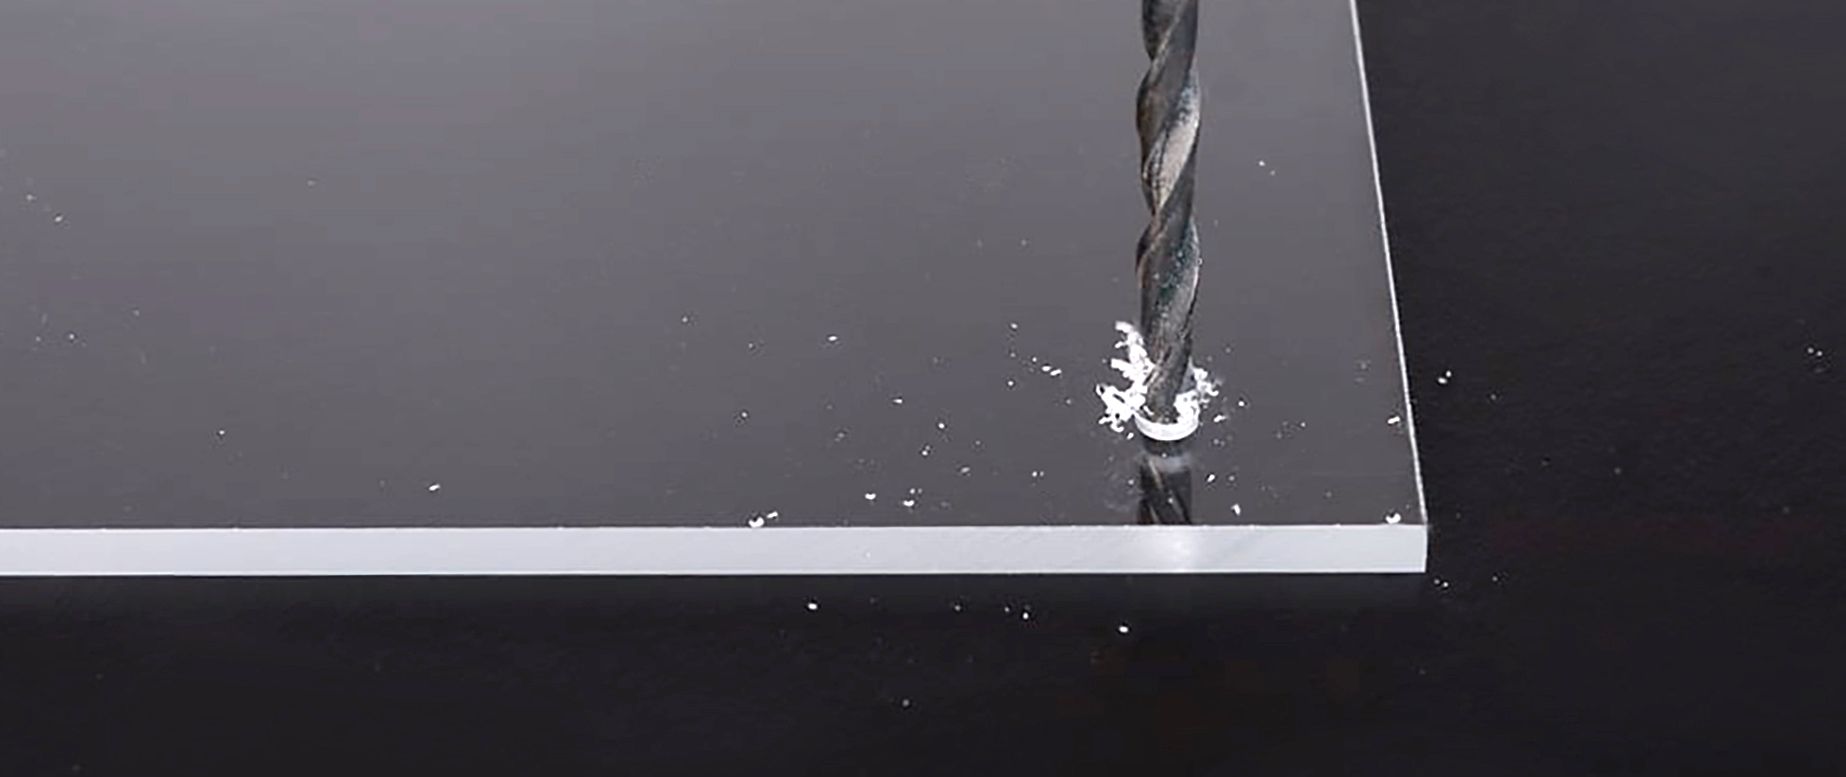
A marker will help you to drill exactly where you intend. Marking a drill point will reduce your chance of causing cracks and splits in your acrylic, as you can ensure the distance from the edge of your sheet to the borehole is far enough to avoid damage to your acrylic. It is recommended that a minimum distance of 15mm from the edge of your acrylic is observed in order to be safe. Use the marker pen to determine a clear point to help you retain the minimum distance and achieve an accurate result.
Masking Tape
Masking tape at the drill site will help to provide extra initial grip; so slipping is less likely at initial contact, it provides an extra barrier while you the drill acrylic, which will help prevent damaging the surface around the drill site.
Safety Equipment
Safety should always be paramount whenever you drill anything and acrylic is no exception, any dust and splintering material can cause damage to your eyes if you don’t protect them properly, so wear safety goggles.
Drilling Acrylic
Keeping the protective film on the plastic
By not removing film that is on all of our acrylic sheets, you reduce the possibility of creating avoidable scratches on the surface of the acrylic whilst you drill the required holes.
Positioning of drill holes
Always keep at least 15mm minimum distance between your drilled hole and the edge of the panel. Never drill closer to the edge than the prescribed 15mm. Failure to leave this minimum distance WILL result in extremely high chance of a material split.
Support the entire panel evenly
The entire panel needs to be supported. Place on a smooth solid work bench and clamp into position to avoid any unwanted movement during the drilling process.
Pilot holes
If needing to drill a large diameter hole in your acrylic sheet, then we recommend that you pre-drill with a smaller diameter drill-bit first. This is known as pilot hole and will help locate and guide the larger diameter drill-bit when making the final drill through.
Use a low-speed drill setting
Drilling acrylic at high speed increases the risk of unwanted results like warping and splitting. When the drill bit rotates at a slower rate, you have more time to make minor corrections and have a better chance at drilling perfectly.
The drilling process
Set your drill with lightly-worn drill-bit to low speed and gently press the rotating drill-bit through the surface at your marked point. Exert low pressure as the bit initially contacts the surface and gradually increase pressure until the drill-bit starts to sink easily through the material as it bores out the hole. If the drill-bit doesn't progress through the material, a slightly higher speed setting may be required.
You should always allow the drill to continue turning whilst you remove it from the hole, so as not to cause unnecessary resistance.
Bonus Installation Tips
Drill larger holes
If the drill holes in your acrylic panel are for screws or fixings to attach your panel to a wall or other surface, remember; Acrylic is a plastic, and like all other plastics it has a relatively high LCoE (Expansion Rate) compared to other material, such as metal. It is therefore necessary to make allowances for this property during installation to avoid damage that may occur with fluctuations in temperature.
Never Overtighten
Overtightening screws or fixings is a recipe for disaster, the stress is extremely likely to cause instant cracking of the panel. Wherever possible the use of washers to alleviate pressure at the hole site is recommended.